The fourth case is where we want to manually configure the image on the paper to crop it (effectively zooming in on part of the image) such that we will get a photo print without a white border but showing only a partial image with edge to edge printing. We will use the same lioness. We will configure the to be printed as a photo print without white space and a specific cropping we manually define ourselves. I choose to create an image a given way, but if you want to crop it to suit your taste, this is the way to do it:

We click on the 8x10 Print link in the 'Featured Products' list to get the confirmation screen of the product from the full product list (you may or may not see this screen depending upon Zenfolio's configuration as it is redundant):

The next step, as always for Zenfolio, is to 'Add to Cart' so we can start adjusting parameters for the print such as paper type, cropping, paper coating, framing and the like. We click 'Add to Cart' button to get the standard product confirmation screen:

We want to adjust image size and position using the Preview and Configure link. Regardless, for good measure, you should always click this link to confirm all the options you want for a print. It lets you set paper types, print coatings, cropping, online custom framing, and more options. It is always good to verify that all the options you would like for any print are selected properly. We click on the 'Preview and Configure' link and get this screen:
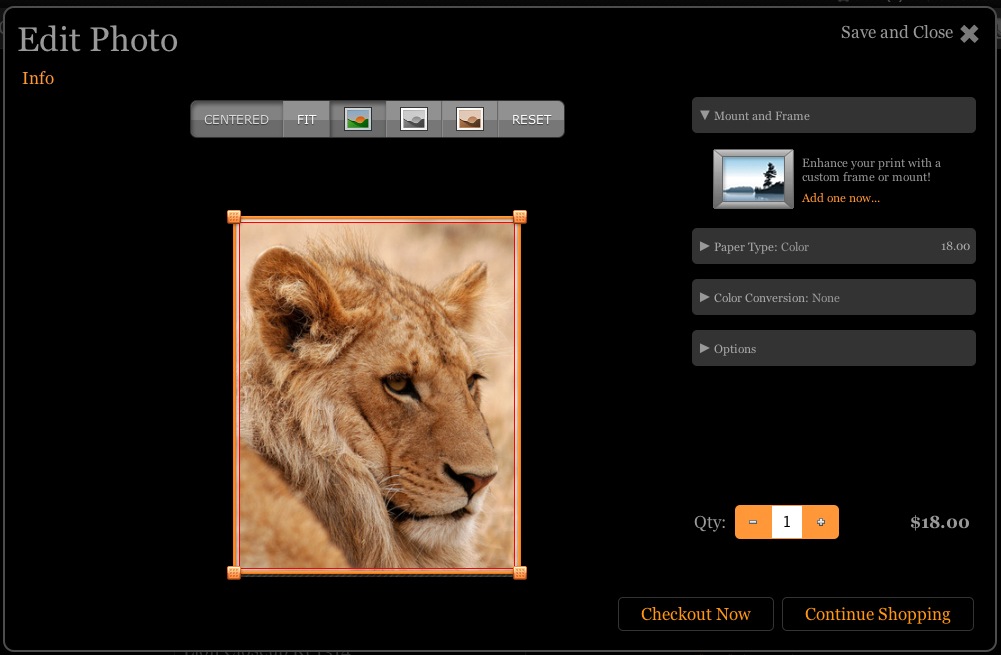
This is the default, and it will print the image with no white space. In this case, we do not want any white space, but we won't want the full image either. We grab the little orange boxes on the rectangle to SHRINK the rectangle to show only a portion of the image and then click and drag the box to center the image part that fits in the box to get (for example):
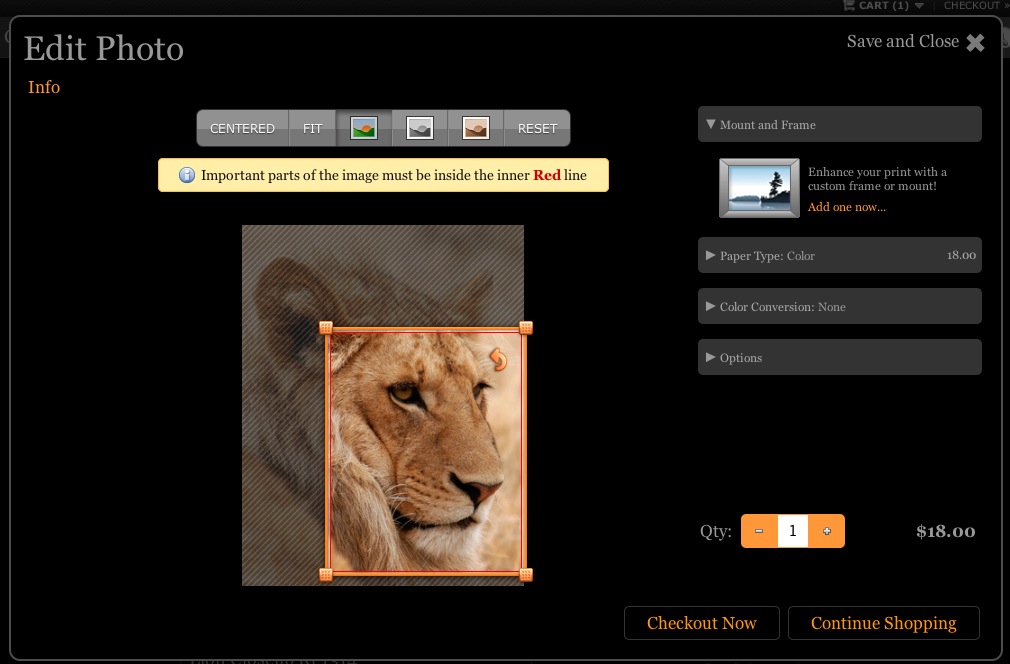
This gives an even closer zoom to the lioness's eyes and face. It is important to realize that THE RECTANGLE IS SMALLER ON SCREEN BUT IT IS STILL THE FULL PRINT SIZE - we shrank the rectangle, but the printed image will still be 8x10.
THE ORANGE RECTANGLE ALWAYS REPRESENTS THE FULL PRINT SIZE FOR THE PRINT PRODUCT WE ORIGINALLY SELECTED
It can seem because we are SHRINKING the orange rectangle that we are also shrinking the print size smaller than the 8x10 size we selected originally. This NOT the case. The orange rectangle ALWAYS stays the same. We are zooming in on a portion of the image NOT shrinking the print size. The portion of the image now selected with be printed to fill the 8x10 print on paper.
If you try to zoom in too much, depending upon the pixel dimensions of the base image file at Zenfolio, you may get an alert (yellow pop up dialog warning box) telling you that you can't shrink the orange rectangle any further. This will vary depending upon what print size your originally selected and how much you shrink the orange rectagle (zoom in on the image).